|
Lesson 1: How to Hold the Crochet Hook
How to Crochet & Basic Stitches
Crochet hooks come in many sizes, from very fine steel hooks, used to make intricate doilies and lace, to larger hooks made of aluminum, plastic or wood, used to make afghans, clothing and household items.
The hooks you will use most often are about 6 inches long and are sized alphabetically from B (the smallest) to Q (the largest).
The crochet hook is the most important tool you will use in learning how to crochet, so it is important to understand each part and its function.
When you look at a crochet hook at first glance it looks like a straight piece with a hook on the end. But when you take a closer look, you will see that each hook typically has 5 necessary parts. It is important to know what each part is used for when learning how to crochet. |
 |
::banner_s::
Please refer to illustration 1. First is the hook end (A), which is used to hook the yarn and draw it through other loops of yarn (called stitches). The throat (B) is a shaped area that helps you slide the stitch up onto the next part of the crochet hook called the working area (C).The finger hold, or thumb rest (D), is the flattened area that helps you grip the hook comfortably, usually with your thumb and third finger. The fifth and final part is the handle (E) which rests under your fourth and fifth fingers and provides balance for easy, smooth work.
It is important that every stitch is made on the working area, never on the throat (B),which would make the stitch too tight, and never on the finger hold (D), which would stretch the stitch.
There are different ways of holding the crochet hook. You will need to experiment and find the way that feels the most comfortable for you. If your hand isn’t comfortable, it will cause your hand to cramp up, and your stitches will not be even. We will show you two ways to hold the hook. Again, play around and find the one that feels most natural to you. |
 |
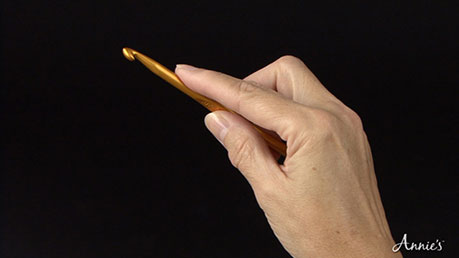
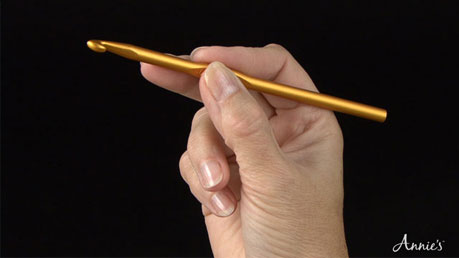
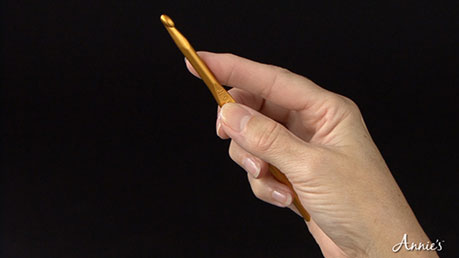
The first position is similar to holding a knife, and your hand will grip over the hook. Place your hand over the crochet hook with the handle resting against the palm of your hand and your thumb and third finger gripping the thumb rest.
|
 |
The second position is similar to holding a pencil. Hold the crochet hook as you would a pencil with your thumb and index finger on the finger hold, and the third finger near the tip of the hook.
The crochet hook should be turned slightly toward you, not facing up or down. The crochet hook should be held firmly, but not tightly. At first you will find yourself gripping tightly but over time, once you feel more comfortable, you will find your hand relaxes.
For demonstration purposes, we will be using the pencil hold. Again, find the way that feels most comfortable to you.
|
 |
|
|
|
|