|
Binding Inside Corners
Use either bias or straight single-fold binding to bind projects with inside corners. Single-fold binding helps decrease the bulk of the seams in those corners where blocks join. Single-fold bias binding stretches to accommodate the stretch on the inside corner. The following method also works with a double-layered binding.
1. To make single-fold binding, cut 1 3/4"-wide strips, either bias or straight of grain, from the binding fabric. Join the strips using diagonal seams on the short ends to make a continuous strip the length of the circumference of the project.
2. Fold 1/4" to the wrong side of the binding along one long edge and press to hold.
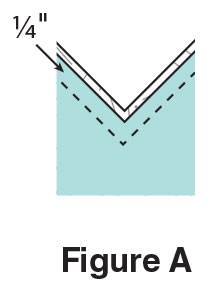
3. Staystitch close to the 1/4" seam allowance through the layers of your project at each inside corner as shown in Figure A.
|
 |
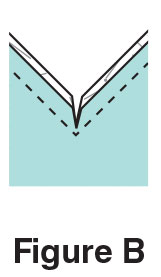
4. Clip into the corner almost to the seam allowance as shown in Figure B.
|
 |
5. Leaving a 12" tail, match the raw edge of the binding to the raw edge of the project top and stitch using a 1/4" seam allowance, mitering at the outer corners.
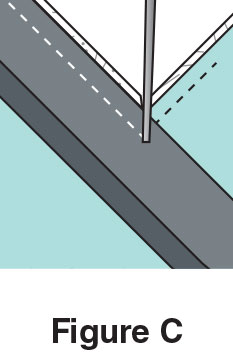
6. Sew the binding to the edge of each inside corner, leaving the needle down at the clip as shown in Figure C.
|
 |
7. Turn the project top and sew along the adjacent side of the inside corner.
8. Continue sewing binding all around, overlapping at the beginning and end.
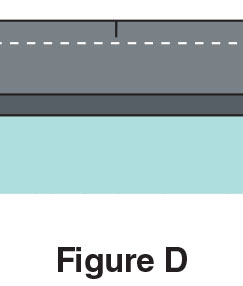
9. Clip into each inside corner of binding just to the stitching line referring to Figure D.
|
 |
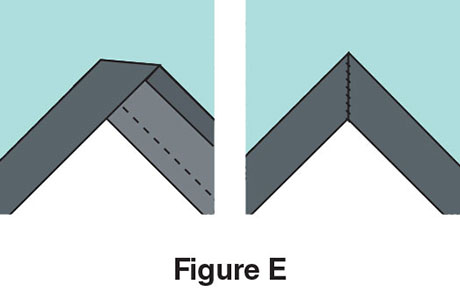
10. Sew the binding down at the inside corners, referring to Figure E, fold down the left side and then the right side and hand-stitch the miter that forms. Turn to the back side and repeat to complete the binding.
|
 |
|
|
|
|